
This Is The Most Elegant Manicure You’ll Ever Try – And You Can Do It At Home!
Do you want to glow up overnight using the Dark Feminine method? Click here!
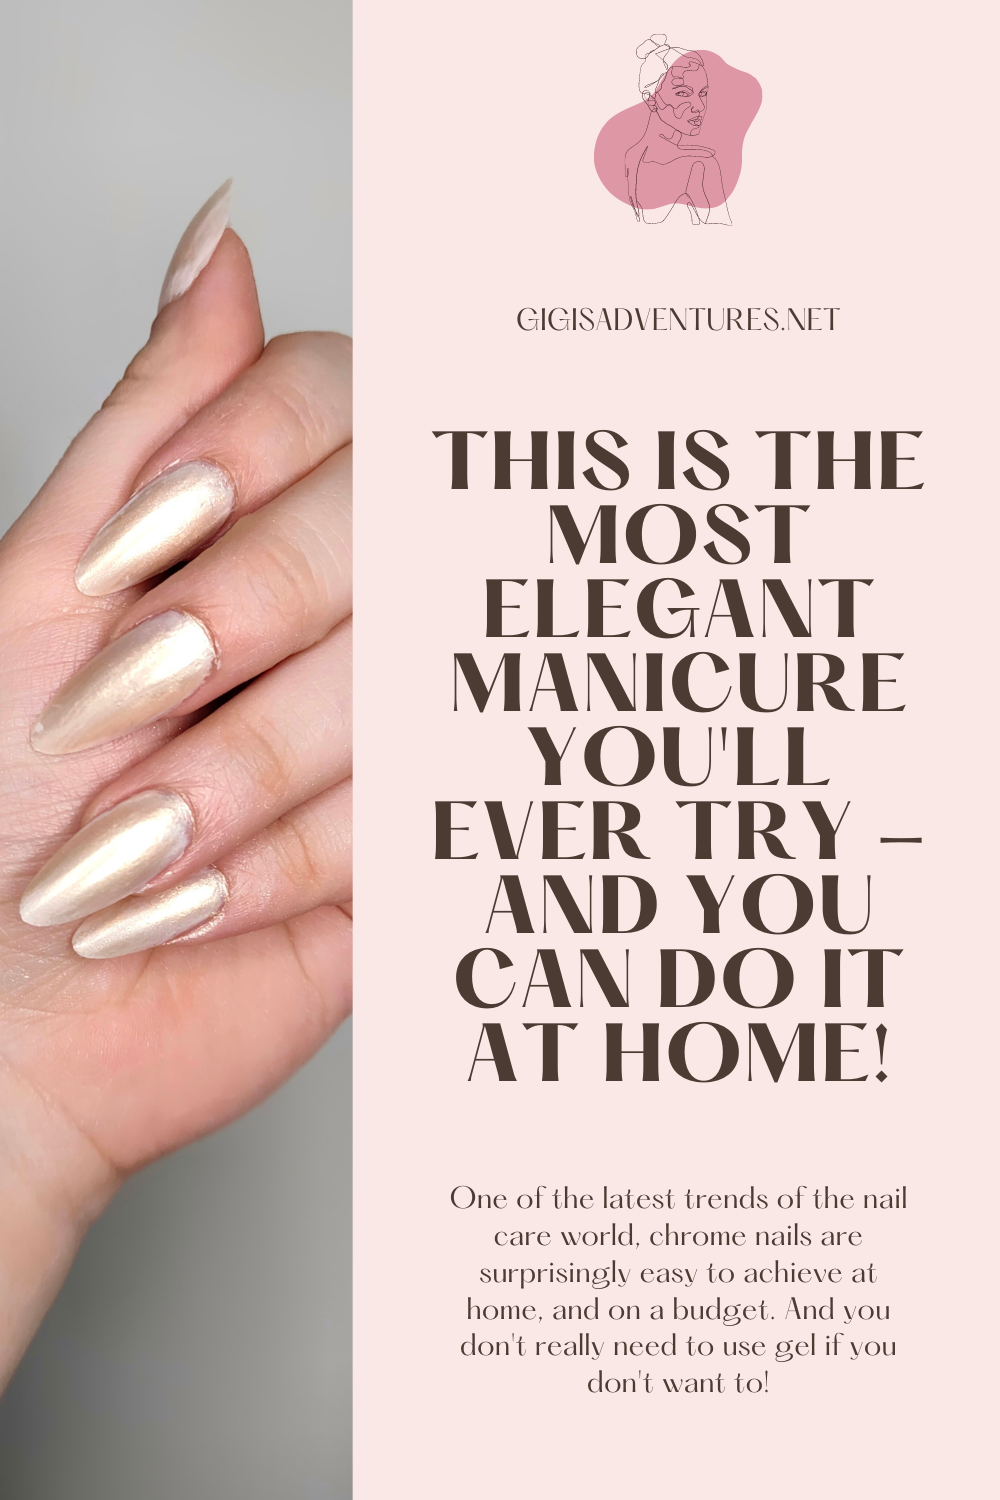
Pearl nails are a very much inexplored trend when it comes to chrome nails, and quite an elegant and fun way to feel a little classier on a budget – and in literally 10 minutes!
Do you want to literally glow up overnight using the Light Feminine method? Click here!
Hey, pretty people!
We have already talked about chrome nails, where we extensively analyzed how to get the look at home, on a budget, without using gel or acrylic products.
As you might have guessed, the premises here are the same – we’re still talking about chrome nails, after all!
In my opinion, pearl nails are the most elegant, classiest spin on chrome nails you’ll find out there.
It takes very few products to achieve them, and you most likely already own all of them. Plus, you won’t need any gel, acrylic or any other product if you don’t want to use them. On the other hand, if you feel comfortable to, I recommend using them!
So, are you ready to find out how to create the most elegant manicure at home, on a budget?
Let’s get started!
Click here to take a look at The Ultimate Glow Up Guide That Will Completely Change Your Life!

YOU’LL NEED
- Clear base + a clear nail polish to finish off the look
- A white nail polish
- A white or champagne makeup highlighter (in powder format)
- 2 makeup brushes; a sponge applicator and a fluffy one
- A cotton bud and nail polish remover
Like we did with the ‘original’ chrome nails tutorial, I am going to give you a few recommendations and elucidations on the items needed. Also, allow me to direct you to this guide on how to take better care of your nails and make your manicure last.
THE WHITE POLISH IS NON-NEGOTIABLE
This is the base of the pearl, and you can’t really substitute it with any other color.o
CHOOSING THE RIGHT HIGHLIGHTER
You’ll find that there are multiple colored-pearls out there, the most classic ones being ‘cool-toned’ and ‘warm-toned’ white ones. For this, I would recommend either picking a white highlighter, or a champagne one. However, feel free to experiment around with different shades and let your creativity run loose!

Alright, let’s get crafting!
Of course, you’re going to start off with clean, dry nails. Apply your clear base and allow it to dry down completely.
Once your base is dry, it’s time to apply your white nail polish. You might need multiple coats; it’s imperative you allow each coat to dry completely before applying another. It’s super annoying, but you don’t really want to deal with wet nail polish while applying your highlighter later on.
When you’re happy with the white base, it’s time to take your sponge applicator and pick up a generous amount of highlighter. Spread it evenly on your nails, and dust off the excess with a fluffy brush.
Lastly, apply a clear coat of nail polish to finish off the look.
And there you have it, your pearl nails are ready to be shown off!

♡ Thank you so much for reading! I hope we kept each other company for a while. Have a wonderful day! ♡